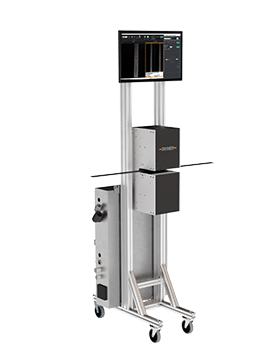
SI2100
Surface Defect Detector – Dual view
The dual-camera-view Surface Defect Detector (SI2100) is designed to simultaneously inspect both sides of flat products. It is the most thorough method of detecting surface flaws available in the industry. It works extremely well on bars, tape, and trim.
With Taymer’s dual view Surface Inspector, you can be certain your products is without surface defects and exceed the high quality standards in place for end-user satisfaction.
Reduced Surface Defects
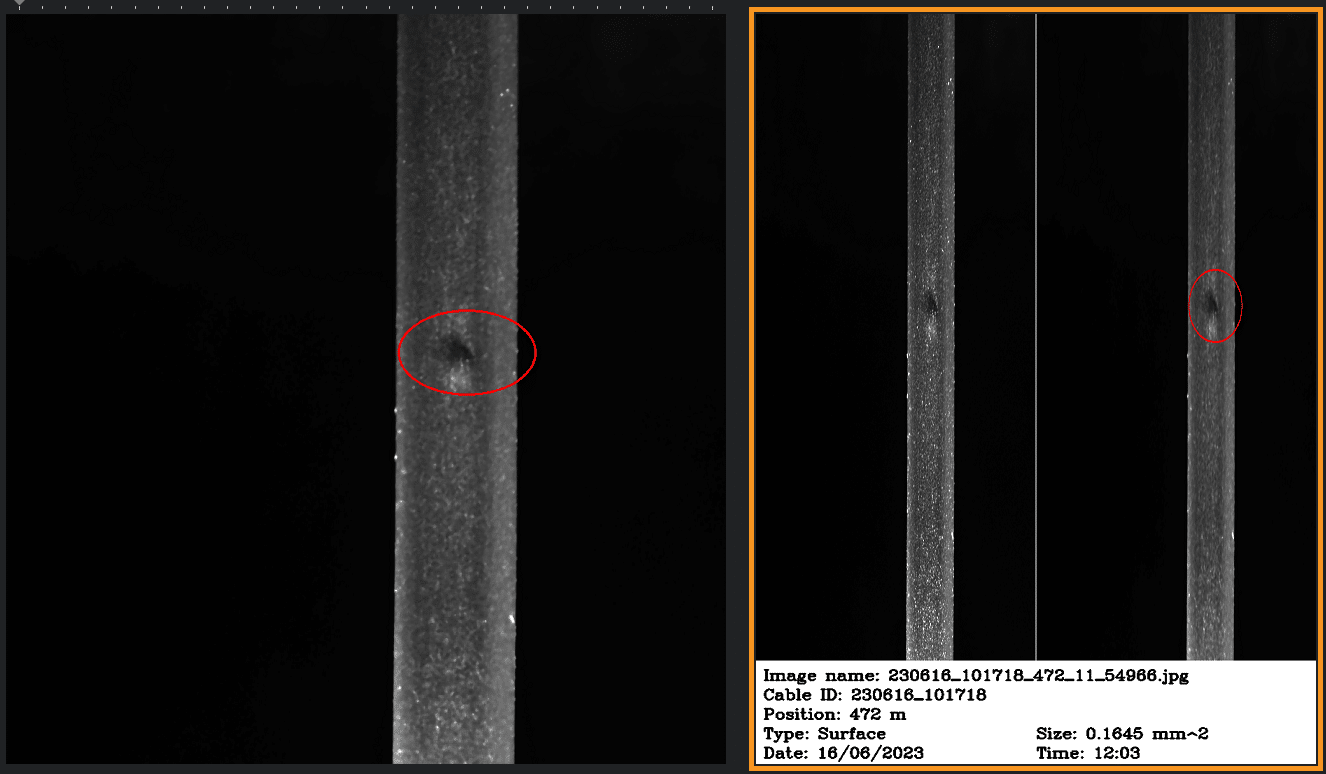
The Surface Inspector provides the operator with instantaneous digital image feedback of your flat product quality on any production line. This continuous stream of real time information – especially the failure images – allows the operator to isolate causes of jacket imperfections and water-soluble tape folds. This result allows you to identify the causes of surface defects and prevents customer complaints or rejects.
Quality Assurance
Implementing the Surface Inspector provides several benefits, you can capture images of your product, save the images to disk, and print them to include in your quality reporting both internally and to your customers. The Surface Inspector’s display also makes it easy for engineering and production supervisors to examine the defect. Defect locations can be recorded, this will allow for further analysis of the defects later on.
Features
- Detects pinholes, scratches, surface blemishes, discoloration, and tears
- Alerts operators and production machinery for any found defects
- Records any defects for QA records and operator verification
- Saves length for each detected defect to allow operators to easily locate them after detection
- Software analyzes 100% of product length
The Surface Inspector will catch any defects on the wires before they reach your customers or fail in the field

Specifications
- Maximum Line speed:
400 meters per minute | 1312 feet per minute - Minimum detectable defect size:
0.1 mm and up – 0.04″ and up - Cable Diameter Range:
0.5 mm and up | 0.002″ and up - Pixels per square mm
- ~100 for large diameter tapes
- ~500 for small diameter tapes
- Up to 100,000 for metal pipe, bar and plate
- Percent overlap between images:
5% - Image processing:
All images from all cameras are read, enhanced and analyzed, resulting in 100% product coverage at maximum line speed
- Lighting:
LED - Location:
Before Printer, on products without print legends - Power Supply:
110V or 220V - Dimensions
- 18″ x 18″ x 20″ – L x W x H (without stand)
- 457 x 457 x 508mm – L x W x H (with stand)
- Custom stands can be built

